Pack-a-Punch

Note: If this is your first time playing, I highly recommend getting aquainted with the ship first. You should know how to navigate from the spawn to the engine room without much difficulty before attempting the full Easter Egg.

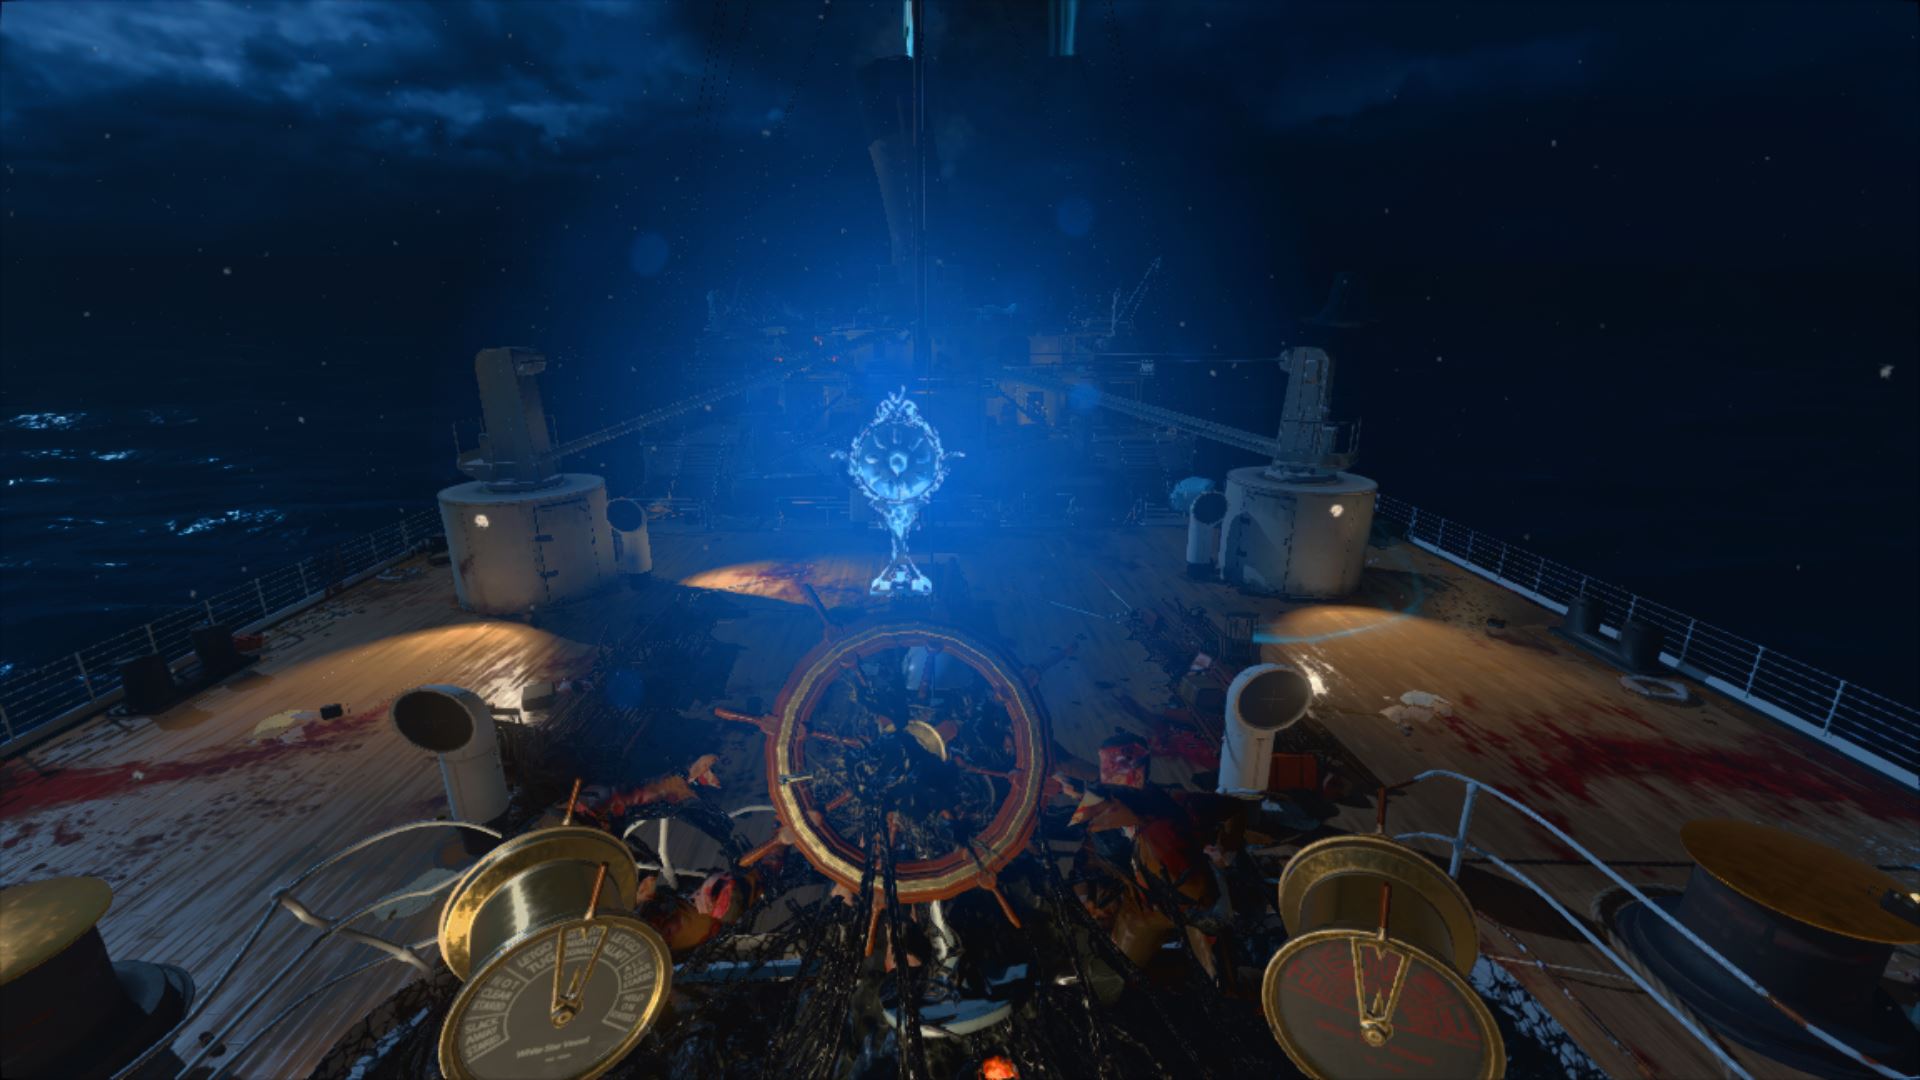
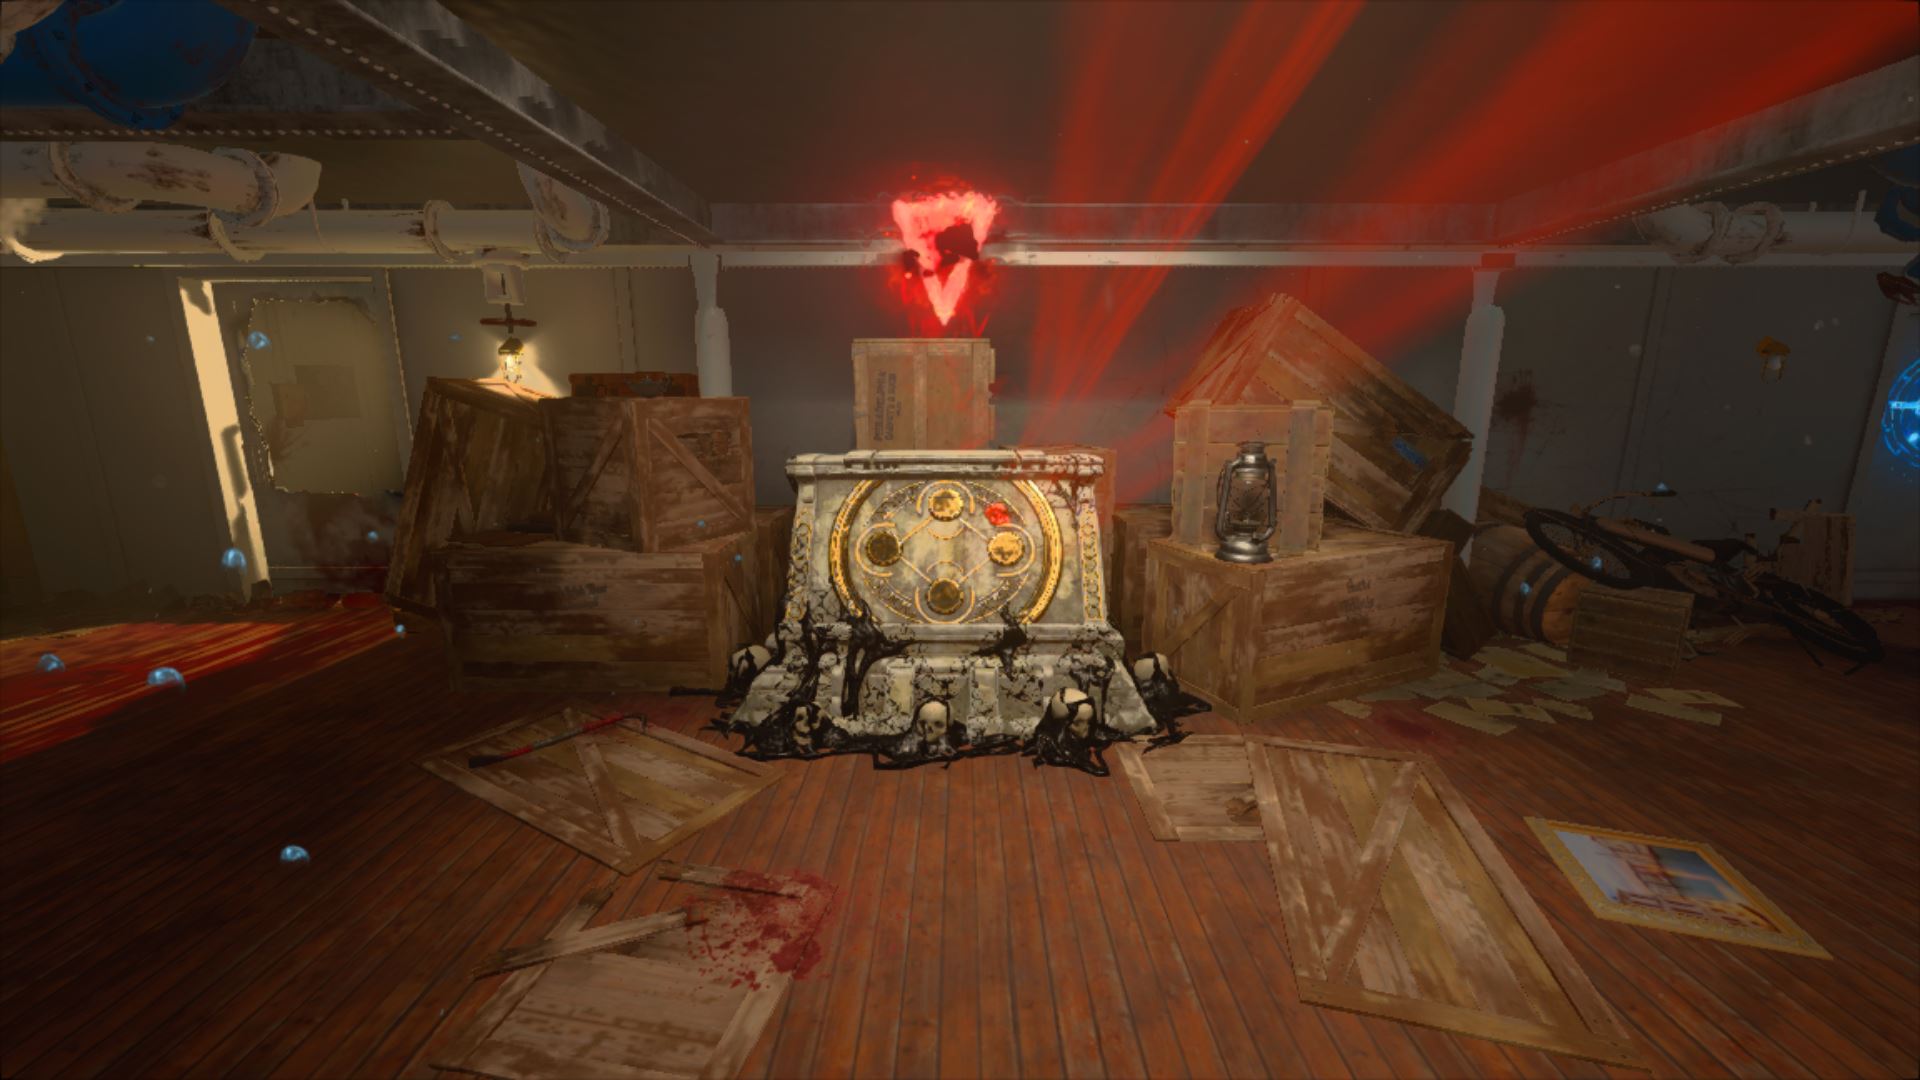
When you spawn, you will find yourself on the front end (bow/Forecastle) of the ship. Your first goal will be to unlock doors until you reach the other end (stern/Poop Deck). Once there, you will see a glowing object suspended above a catwalk. Climb onto the catwalk and interact with the Artifact to open additional areas of the ship and begin the Easter Egg.

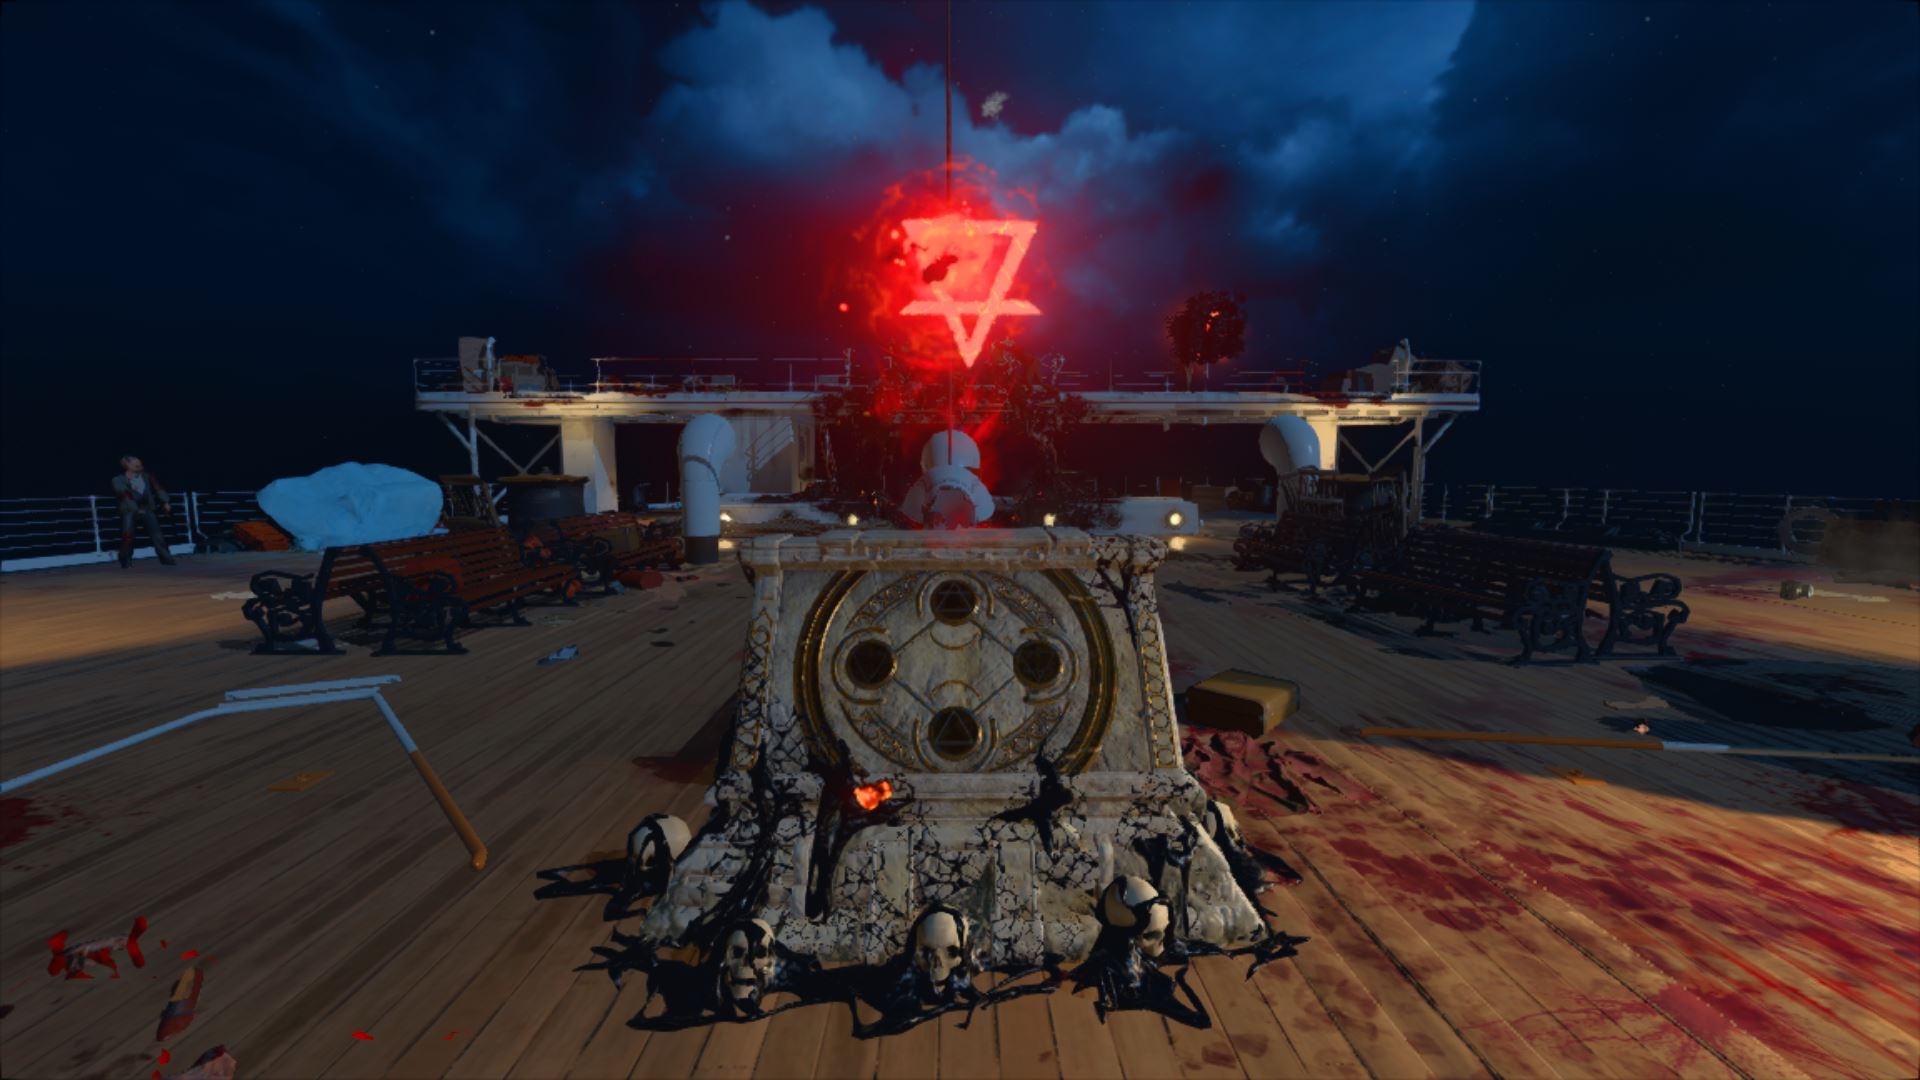
Four terminals will appear across the ship.

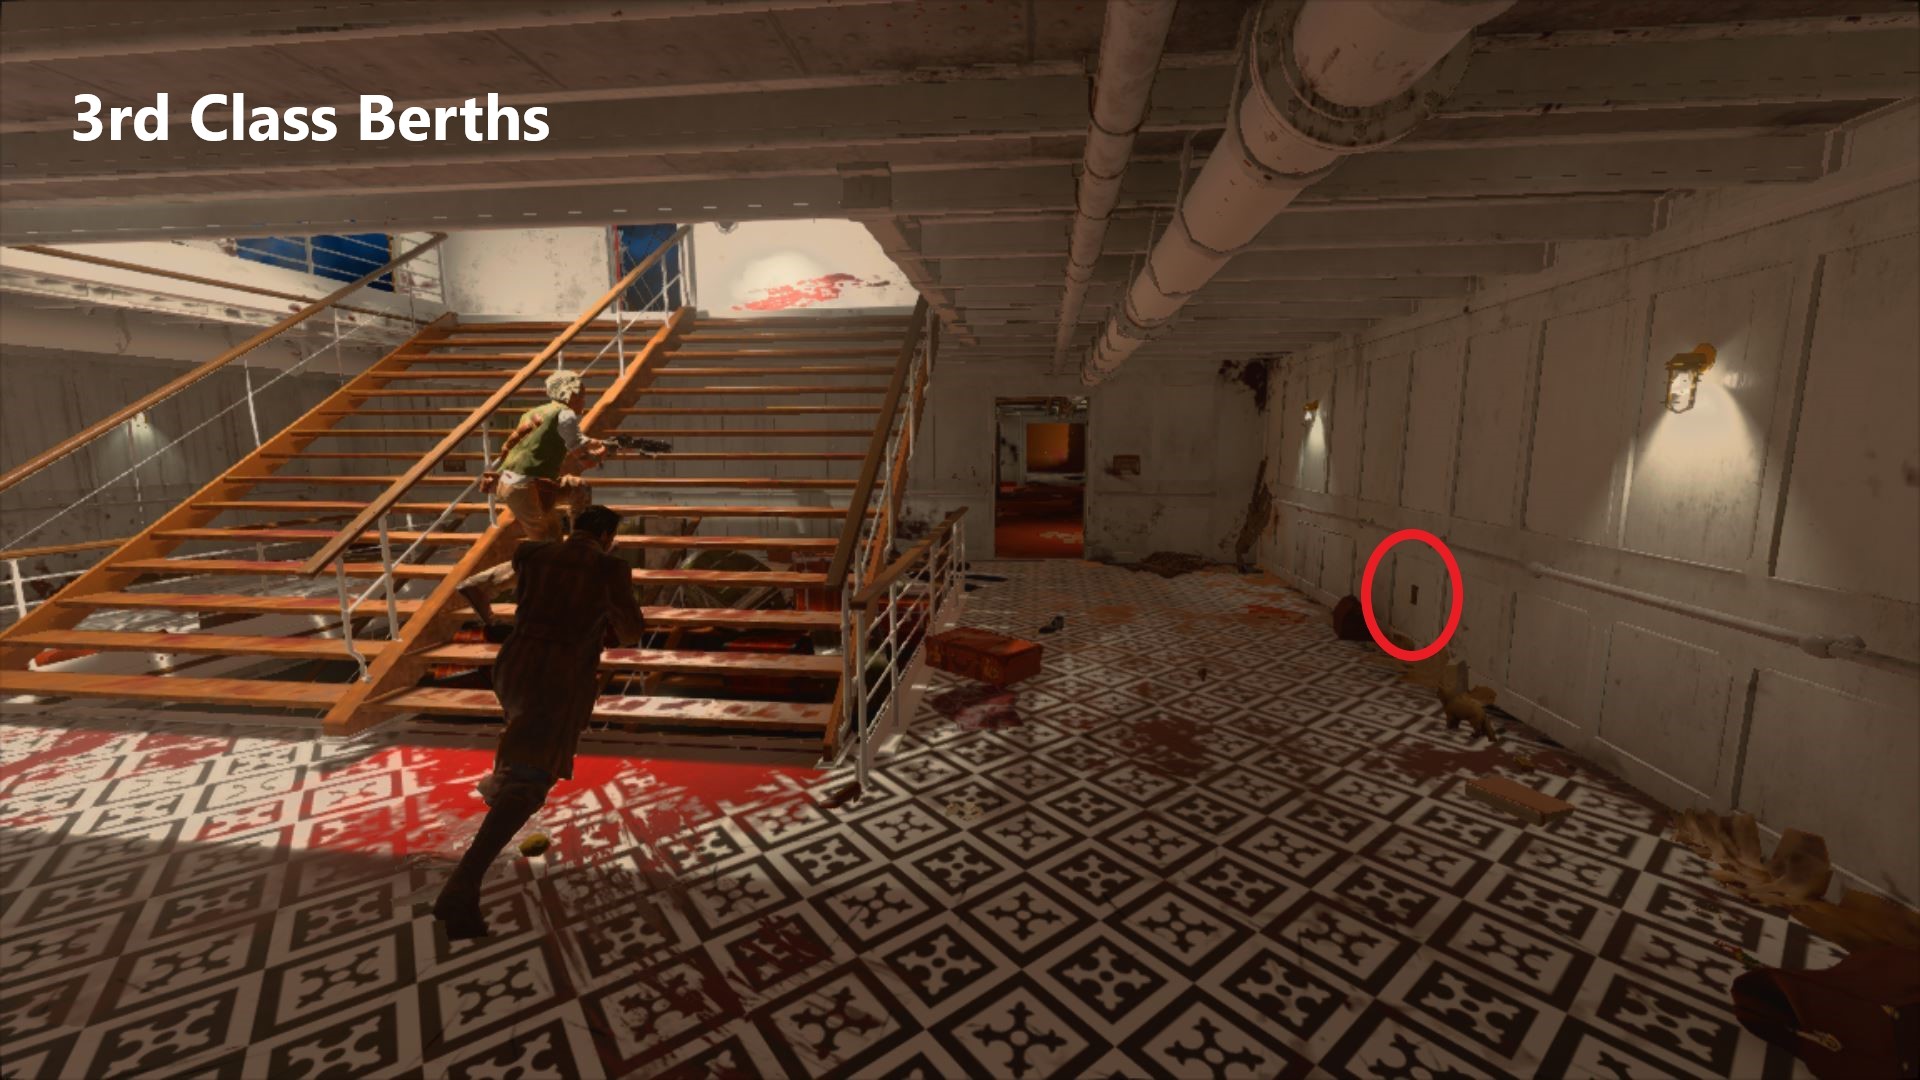
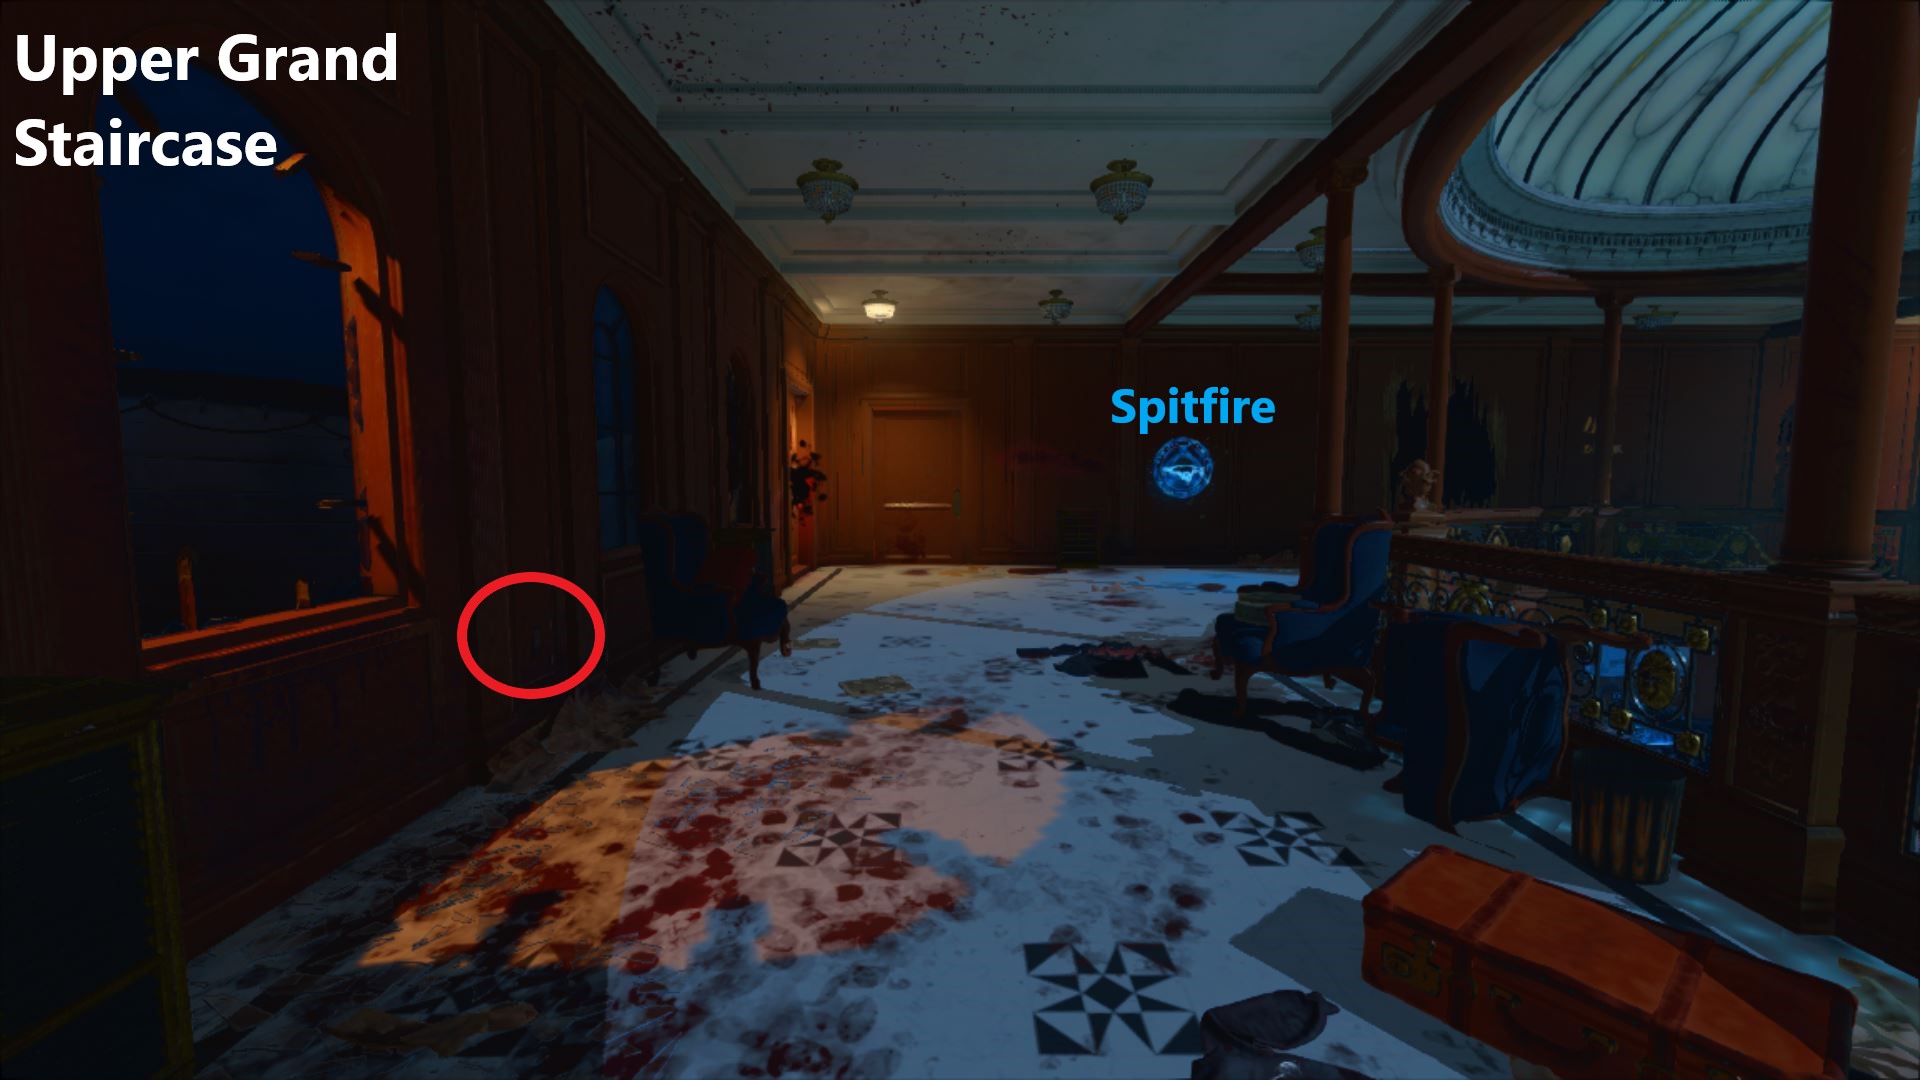
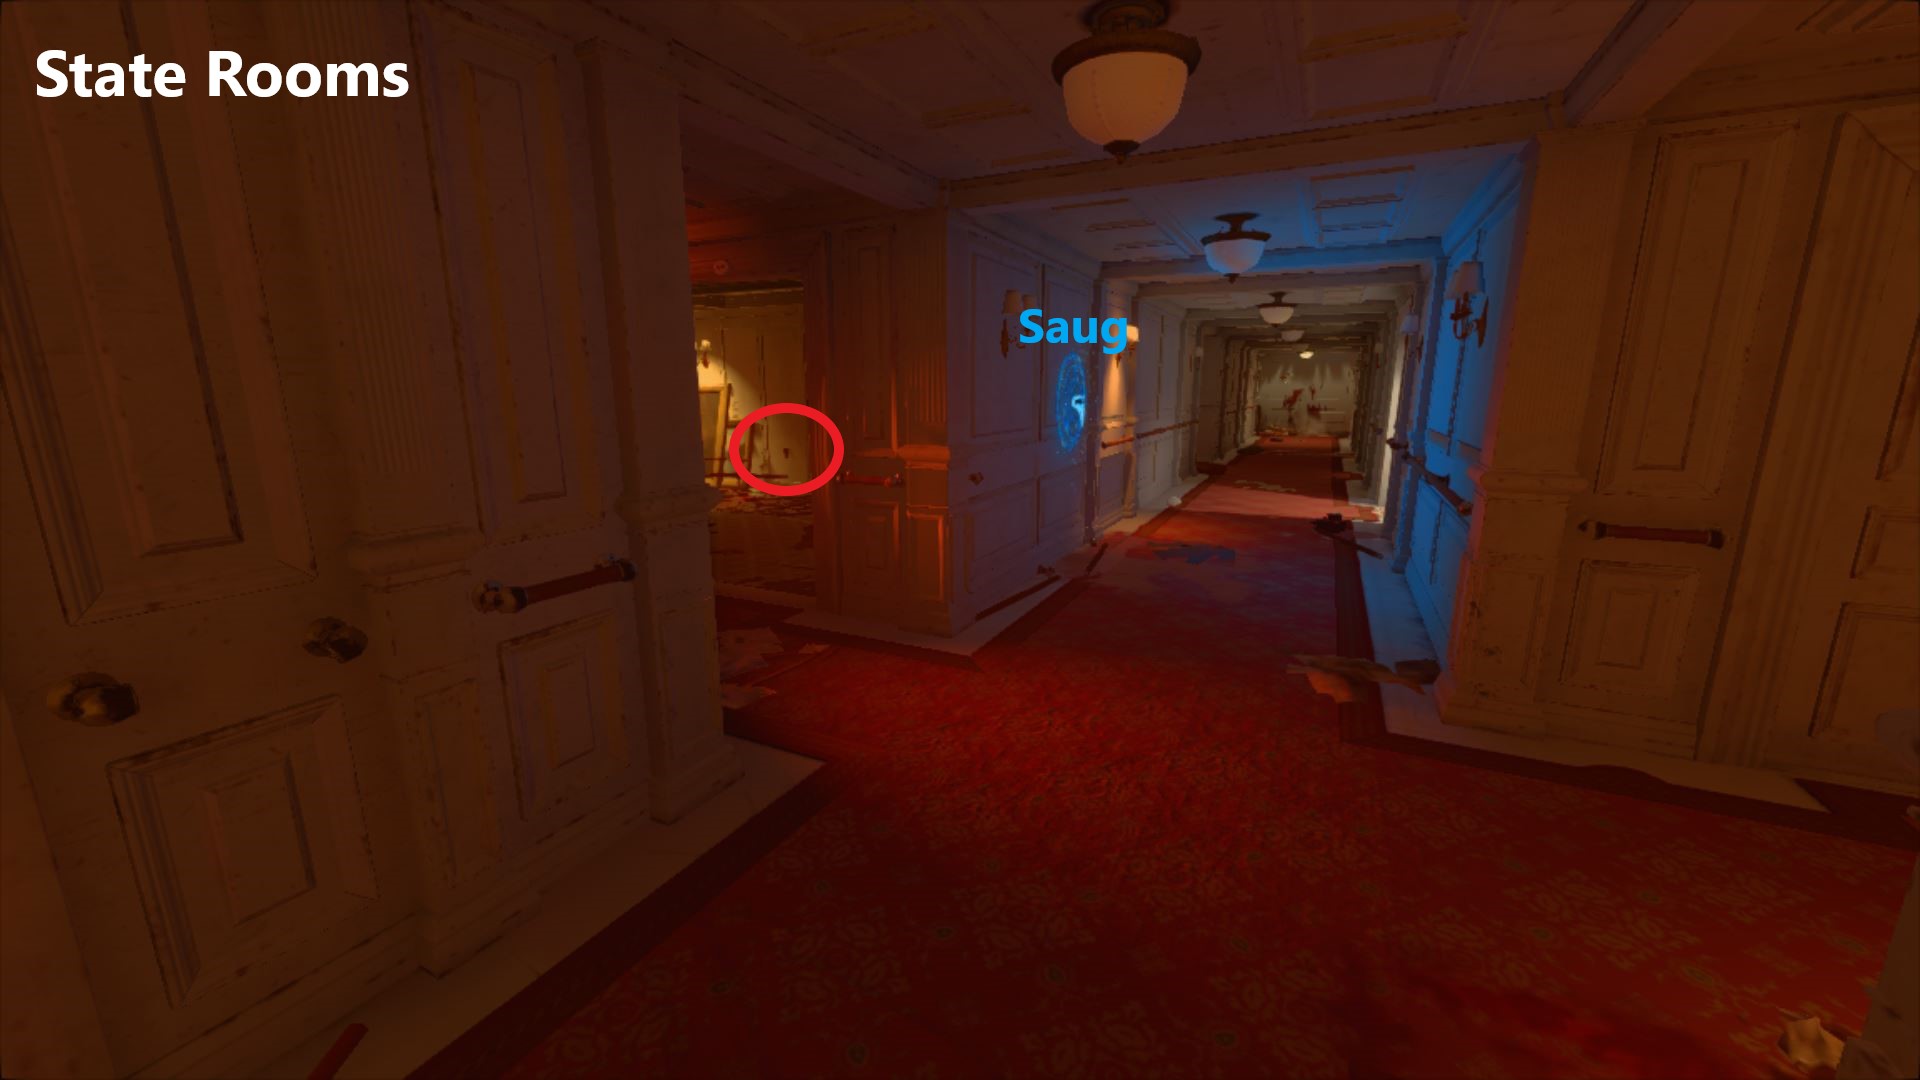
The first of these terminals will be located near where you grabbed the artifact. Interact with the terminal to unlock it. Once you have unlocked all four terminals, the Pack-a-Punch will appear in place of the last activated terminal. This location is not static, and will move from round to round to one of the four terminal locations.

Locating the Pack-a-Punch

You can determine the current location of the Pack-a-Punch by walking up to a terminal and reading the text that appears on screen. Each of the locations also correlates with an elemental symbol (see Clocks). Once learned, they can be used to determine the location from a distance. The active terminal's element will be lit up.

Unlocking All Locations

Once you have an elemental Kraken, you may unlock the Pack-a-Punch in all locations. If you do not yet have one, you can follow the Kraken guide and Distillery guide.

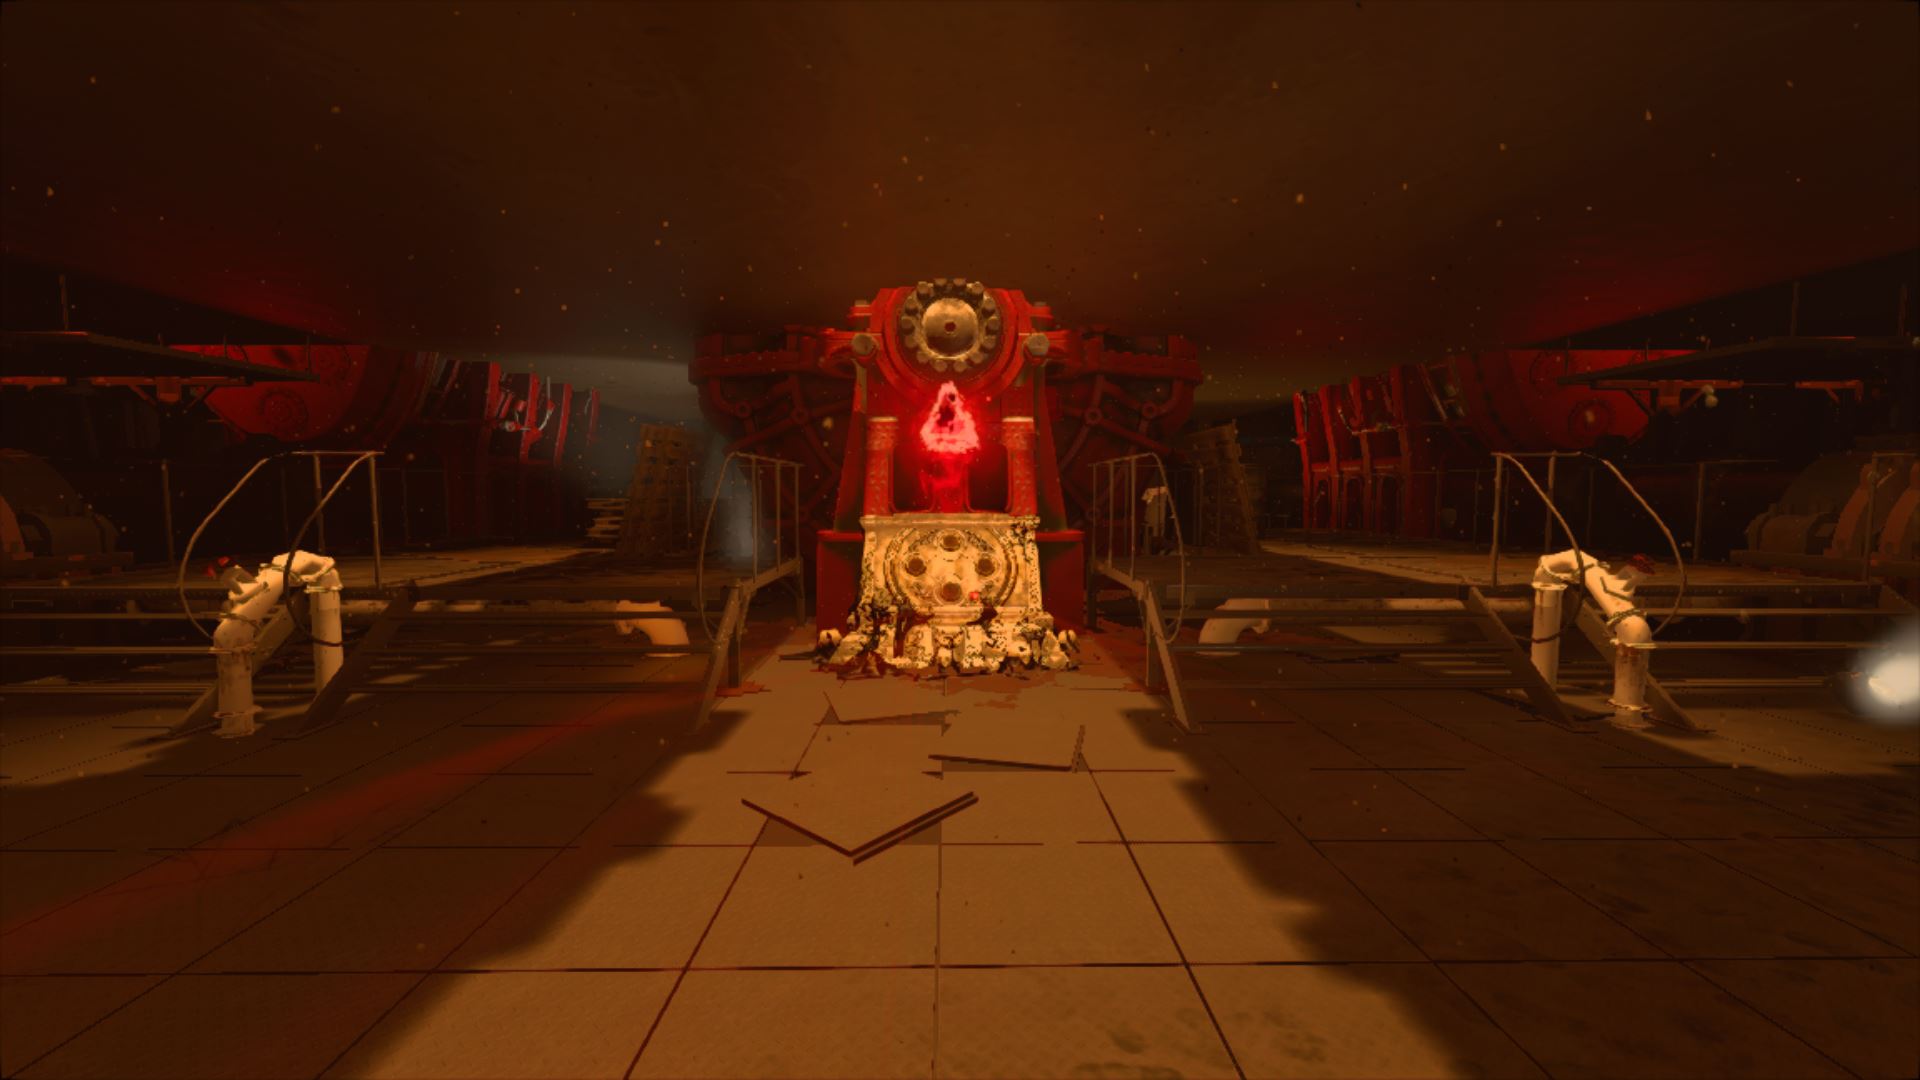
In the engine room, use the Kraken to shoot the four moving pistons in the center of the room. They will begin smoking and stop moving.

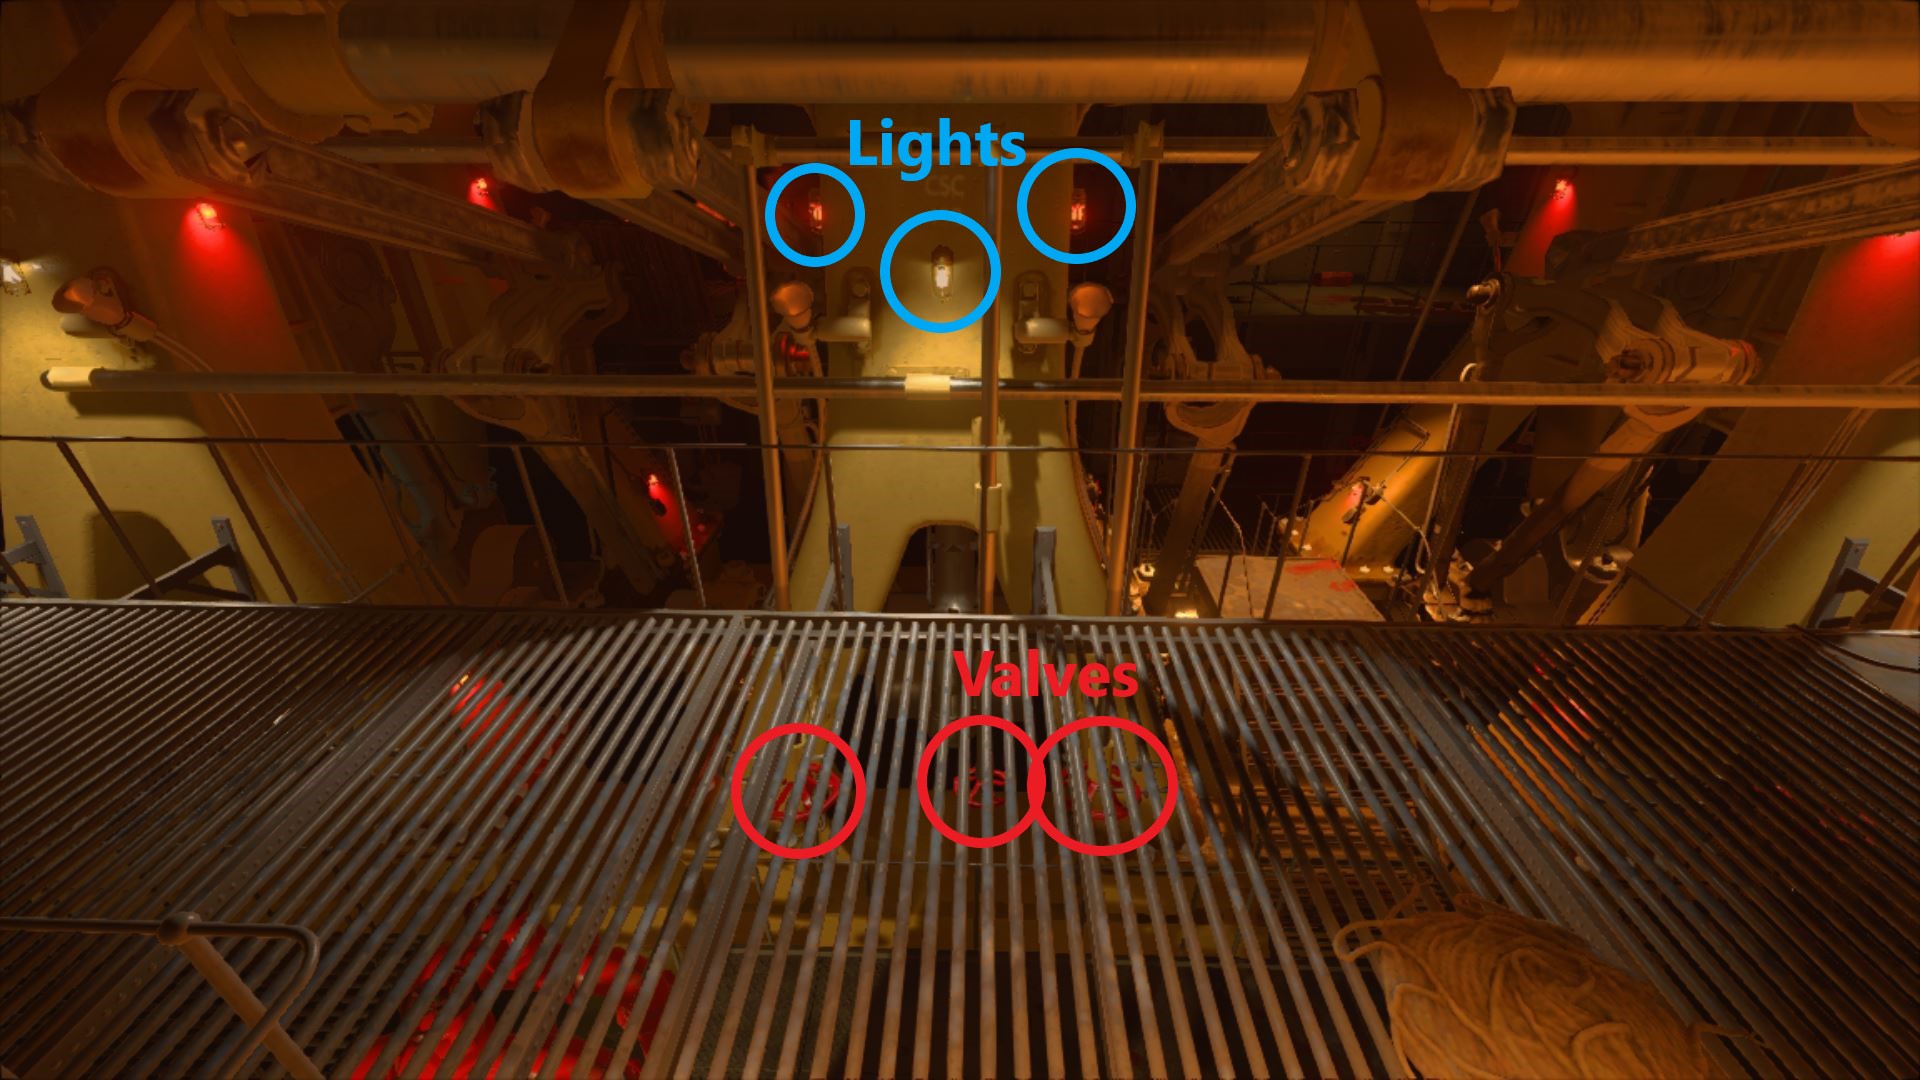
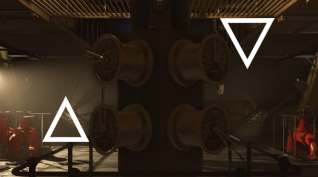
Above the pistons, there will be several red wheels with matching lights further above them (3 per piston, 12 total). Looking up at the lights, turn the wheels that have a flashing light. This light can be red or white. If a wheel does not turn right away, holding the interact key (F on PC) will work. You must turn each wheel so the handle-bar is facing away from the light. The bars below the non-flashing lights must be turned toward the light.

There should be six flashing lights. Once all six wheels have been turned, step into the Turbine Room and look to your right. Against the wall there will be a lever. Pull it to complete the upgrade.

The new Pack-a-Punch will spawn in all locations, cost 5000 points to upgrade, but will also refill the ammo of your weapon. This effect will last one round, after which the Pack-a-Punch will return to its normal rotation.

A glitch may occur if you attempt to upgrade the Pack-a-Punch before completing the Pipes section of the easter egg. The Pack-a-Punch will revert to one location and will not automatically move to the Turbine Room once it is flooded. You may be forced to wait several round before being able to upgrade the Artififact. Therefore it is best to use "Unlocking All Locations" Easter Egg after you have all the pipes leaking, allowing you to instantly Pack-a-Punch the Artifact.

Draining

When you reach the engine room and cargo hold, they will be flooded. You can drain these areas easily by using a well-lit wall valve located somewhere under water.

Once the Pipes Easter Egg is completed, these sections will re-flood, but can be drained again using the same valves.

Clocks

See the Help section for more info on completing the clocks.

Fire

Fire

water

Water

air

Air

earth

Earth

It is not necessary to record the locations of the clocks. However, if a mistake is made, knowing the locations can help correct issues more quickly.

Locations

The clocks will appear in 4 of the 6 possible locations. In order to determine which clock is active, you must locate the corresponding symbol. The clock/symbol combinations are random every game, but will not change once they spawn.

  1. 1st Class Lounge
    • Clock - Directly across from the Zeus Altar. On a fireplace mantel.
    • Symbol - To the right of the clock on the wall. To the left of the Mystery Box spawn.
    • Image
  2. 3rd Class Berths
    • Clock - At the bottom of the winding staircase. To the left of an open window with a skeleton inside.
    • Symbol - At the bottom of the winding staircase. Behind the luggage within the curve of the staircase.
    • Image | Video Guide
  3. Bridge
    • Clock - Above the main steering wheel.
    • Symbol - Under a desk to the right of the main steering wheel.
    • Image
  4. Kitchen/Galley
    • Clock - On the right side of the room when entering from the Dining Hall. On a wall to the right of a flaming window.
    • Symbol - On the right side of the room when entering from the Dining Hall. On cabinet in the center of the room.
    • Image
  5. Upper Grand Staircase
    • Clock - Top floor at the head of the stairs.
    • Symbol - Above a door to the left of the Scorpion Wall Weapon.
    • Image
  6. Mail Room
    • Clock - To the right of the right-most entrance to the Cargo Hold.
    • Symbol - Underneath the staircase leading to the clock. Behind some crates.
    • Image

Dial Locations

  • Bridge
    • On the furthest point forward of the bridge. In an open air room. There will be four dials next to a wheel.
    • The dials are labelled with the appropriate symbol, so check each side of each dial and match that face of the dial to the symbol.
  • Poop Deck
    • Where the Artifact initially spawns. There will be a captains wheel, a large amount of goo, and two dials.
    • The left dial corresponds with the Air symbol. The right dial corresponds with the Earth symbol.
    • Image
  • Engine Room
    • At the bottom of the staircase in front of Odin.
    • There will be four dials on a pole. The top left and bottom right will be broken. The bottom left corresponds with the Fire symbol. The top right corresponds with the Water symbol.
    • Image

Outlets

See the Help section for more information on completing the Outlets

Acid


Water


Electric


Fire


You must use the portals created by the outlets in a particular order.
  1. Acid
  2. Water
  3. Electric
  4. Fire

Locations

The outlets will spawn in 4 locations, chosen randomly from a pool of 6 possible locations. The outlet will always be present in the location, but will not always be "active." You will know an outlet is active because it will occasionally spew a certain element from the list above. See the Help section for more information.

  1. Aft Deck
  2. 1st Class Lounge
    • On a support beam to the left of the Zeus Altar.
    • Image
  3. 3rd Class Berths
  4. Dining Hall
    • To the left of the Ra Altar. On the opposite side of a very small wall.
    • Video Guide
  5. Upper Grand Staircase
    • Top floor. Between the clock and symbol locations. In front of the Spitfire spawn
    • Image
  6. State Rooms
    • In a set of rooms on the left when entering from the spawn. Next to some unhung paintings. Inside the room behind the Saug spawn.
    • Image

Distillery

The distillery is a buildable workbench that can be used to upgrade the Kraken to different elemental types. One of these types (acid) is necessary to complete the flooding section of the Easter Egg. There are three pieces in total, each with a unique set of spawn locations. Once all three are gathered, the distillery can be built above the Turbine Room on the wooden workbench.

Inventory Icon

Locations

  • Galley - On the left side of the Kitchen/Galley when entering from Ra/Grand Staircase. A small item on a fiery counter.
  • Galley - On the right side of the Kitchen/Galley when entering from Ra/Grand Staircase. On a set of shelves on the far right wall.

Inventory Icon

Locations

  • Cargo Hold - In the middle of the room. On top of a stack of burning boxes and milk jugs. It is sitting to the left of an oil lantern.
  • Cargo Hold - To the right of the water-drainage valve.

Inventory Icon

Locations

  • 1st Class Lounge - A Deck. Climb over the fallen door while leaving the Grand Staircase. The pot will be on the first table on the right.
  • 1st Class Lounge - A Deck. Climb over the fallen door while leaving the Grand Staircase. The pot will be on a small table around the corner on the left.

Once constructed, you will need to gather an elemental component from an elemental zombie. To do this, simply kill an elemental zombie with the Kraken and pick up the item it drops. You are not guarenteed an item drop by killing a zombie; several zombies may be necessary before one drops. The item names and appearance in the inventory can be found below.

Elemental Components

Pipes

For this next section, you will need a Kraken upgraded with the Acid element. See the Distillery section for more info.

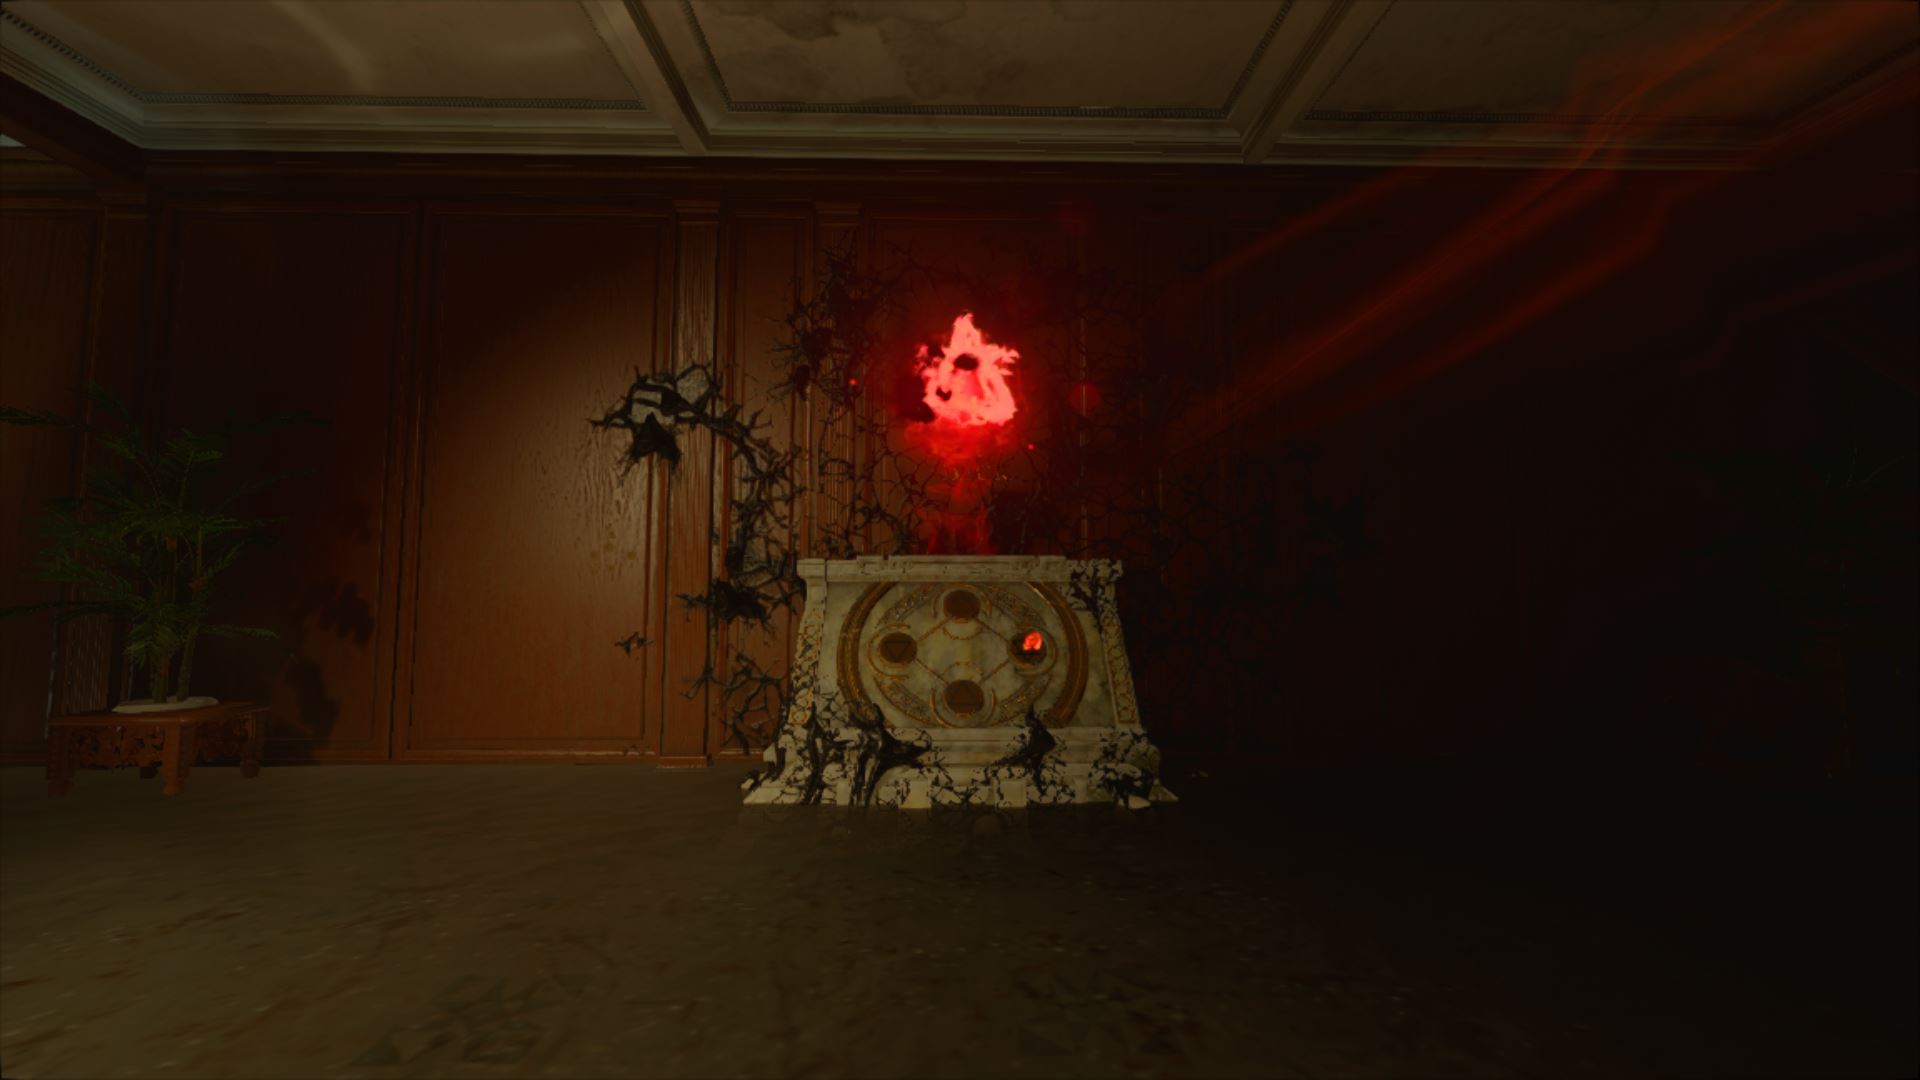
Once you have the restored Artifact, you will need to go to the Turbine Room. There will be 9 blue pipes with one or two leaks in them. Initially, these leaks will be spewing steam only. But, once you hit them with an Acid Kraken, they will also begin leaking small droplets of water. After all nine have been hit, the room will re-flood.

Next, you will need to wait until the Pack-a-Punch is moved back into the turbine room. You will then be able to Pack-a-Punch the Artifact, completing this step of the Easter Egg.

Planets

For this next section, you will need to locate and interact with nine symbols representing 7 planets, the sun, and the moon.

Once you have aquired each symbol, you will need to proceed to the Cargo Hold and interact with the Planetarium that appeared after draining the Cargo Hold for the second time. This Planetarium will be located to the left of the car used to upgrade the Ballistic Shield. Once interacted with, the planets on the display will begin to light up in a particular order. Use the section below (or the Alternative section) to record the order in which they light up. The sun will always be the last.

Once you activate the Planetarium, a horde of zombies will attack. This horde will give the players no points.

Once you have the order written down, your next step will be to go to the deck of the ship and shoot each planet in the sky in the same order they lit up on the Planetarium. After shooting a planet, a blue orb will fly to the location of the planet's symbol and land nearby. You will have a short period of time to pick up each orb before they disappear. A horde of zombies will spawn with each planet shot, again rewarding no points.

If you fail to pick up an orb or shoot the wrong planet, you will have to start the process over again by interacting with the Planetarium.
Do not shoot the sun until you are ready to proceed to the next section. It is recommended that you have at least one Staff of Rah ready.

Once you shoot the sun, all players must interact with the orb it creates. After, the ship will freeze over with ice blocks barring every doorway. You must destroy the ice blocks in order to reach the far end of the ship, near where the Artifact spawned.

Destroy the final block of ice on the Poop Deck to unlock a short cutscene and a portal to begin the boss fight.

The Staff of Rah is particularly effective for this section.
Additionally, it is recommended to ignore the hordes and mini-bosses and allow your shield(s) to absorb most of the damage.
One of the ice blocks will drop a Max Ammo, so be sure to leave one person behind to grab it if needed.

Alternative Sorter

Click and drag a planet between the two lists to keep track of their order. The planets are initially sorted in alphabetical order for convenience. The sun always comes last. Use the reset button above to reset the order.

  • Jupiter
  • Mars
  • Mercury
  • Moon
  • Neptune
  • Saturn
  • Venus
  • Uranus
  • Sun

Ballistic Shield

The shield is a buildable piece of equipment that can both be used as a weapon, similar to Ajax's shield from multiplayer, and also as a protection to the player's back. There are three pieces that need to be located before it can be built. Each piece randomly spawns in 1 of 3 unique locations.

You can check your progress in finding the parts at any time by holding the TAB key on PC.

Part 1 (Top)

Inventory Icon
  1. Bridge
  2. Bridge
    • On the railing of a smal hallway between the bridge and the Grand Staircase. Behind the Rk7 spawn.
    • Image | Video Guide
  3. Bridge
    • Outside. On a railing to the left of the Bridge when looking towards the spawn.

Part 2 (Middle/Grip)

Inventory Icon
  1. State Rooms
    • On the shelf of a large supply closet, next to some towels. The room across from the Saug spawn.
  2. State Rooms
    • In the room on the left side when entering from the spawn. On top of a chair facing the door.
    • Image | Video Guide
  3. State Rooms
    • On a rolling chair in the room adjacent to the Mog Wall Weapon.
    • Image

Part 3 (Bottom)

Inventory Icon
  1. Provisions
    • On a box next to some large apple crates. To the left of the ICR Wall Weapon.
  2. Provisions
    • Leaning against the wall on some boxes. Directly behind the stairs leading to the 3rd Class Berths and down the hall.
    • Image | Video Guide
  3. 3rd Class Berths
    • Leaning against a white wlal on a railing to the right of the staircase leading to the Poop Deck. To the left of one of the clocks.
    • Image | Video Guide

Upgraded Shield (Sylvann Guard)

Once the shield has been created, it can be upgraded via another series of steps. The upgraded shield has more health and a freezing bullet effect and is particularly effective against Blight Fathers

First, grab a shield, go to the Mail Room, and locate the medium-sized safe on the floor. You should notice a small, crab-like device on it - this is the code cracker from the Intro Cutscene. Bash the code cracker with the shield to cause it to fall to the ground and pick it up.

Next, look around the nearby rooms for four bones. Near each bone should be a piece of paper with a code on it. Take note of these four codes and which piece of the skeleton it is near.

Skull


Longbone


Hand


Foot


The Skull's code is particularly hard to see. There are several bottles sitting in front of it that must be broken, and on lower resolutions the code can be blurry. If you are having trouble reading the code, you may need to purchase a sniper rifle or scoped weapon.

With the code(s) in hand, you must locate four safes around the map.

Place the code cracker on the safe and look at the code it generates. This code will correspond to a bone piece and its piece of paper. Return to the mail room, pick up the matching bone, and place it in the matching safe.
Note: If you pick up the wrong bone, simply interact with the spot it was sitting to place it back down.

If you put the wrong bone into a safe, you must put bones in all four of the remaining safes and finish the current round to restart the Easter Egg.

In order to do the next safe/bone, you must complete the current round.

Once all four bones have been placed into safes, you may return to the Cargo Hold and look to the left of the portal at the bottom of the stairs. Interact with the car inside the crate and it will sink into the floor, then begin driving around in the sky. However, it is better to get several vials prepared before activating the car. Read the next steps for more information.

Having audio on can be helpful in locating the car, since it plays a unique sound while flying.

Next, you must navigate the map and shoot small green vials, similar to the ones seen in the Intro Cutscene. These vials are located within mail tubes, so look for long, curved piping when searching. The mail tubes will always be located within an interior window/broken door.

You may shoot the vials at any point, including at the beginning of the game. It is recommended to start working on the vials as early as possible, especially if you're trying to complete the shield in as few rounds as possible. You may collect one vial per round.

Once you shoot a vial, it will drop out of another pipe in one of several locations.

Pick up the vial and add it to your inventory. You must retrieve one vials before proceeding, but may retrieve up to four.

Once you have a vial, place it within one of four small white tubes on the ship's deck.

Shooting the white tube after will cause a firework to shoot into the air. Use these fireworks to hit the car. If you miss, you may retry with the same tube after a cooldown period. The car will disappear after a certain time limit, but may be reactivated by reusing the car in the Cargo Hold.

Once hit, the car will fly around for a while longer before running into an iceberg in the water. A blue piece of ice will fly towards the shield workbench and upgrade the shield. Your current shield will not be automatically upgraded, but picking up the new version is free.

You can tell you have successfully hit the car when the noises it makes change or speed up or the firework can be seen embedded in the bottom of the car.